The ChannelShipper API is an integration that allows you to create orders in ChannelShipper via API from your own order management systems. This is suitable for eCommerce companies and websites that do not already have a direct integration with ChannelShipper.
Please note that some level of development knowledge is required to import orders into ChannelShipper by this method.
For developer documentation, click here: https://api.channelshipper.com
Please note - ChannelShipper and Click & Drop use the same API domains, but some actions are reserved for ChannelShipper accounts only.
Contents:
- Getting started
- Creating an integration
- Authentication
- Actions
4a. Create orders
4b. Retrieve orders
4c. Retrieve orders details
4d. Delete orders
4e. Change order status - Retrieve labels
- Troubleshooting
1. Getting started
If you use your own order management systems, or you use an eCommerce integration that does not currently have a direct integration to ChannelShipper, you can use the ChannelShipper API to create orders and retrieve the necessary labels and other documentation within your ChannelShipper account.
What the ChannelShipper API can do:
- Create one or more orders in ChannelShipper
- Retrieve order information from ChannelShipper
- Retrieve labels and other documents after orders have been created
-
Delete orders in ChannelShipper
-
Reset orders in ChannelShipper
-
Mark orders as Despatched in ChannelShipper
-
Mark orders as Despatched By Other Courier in ChannelShipper
2. Creating an integration
To begin, log into your ChannelShipper account, and navigate to 'Settings' > 'Integrations'.
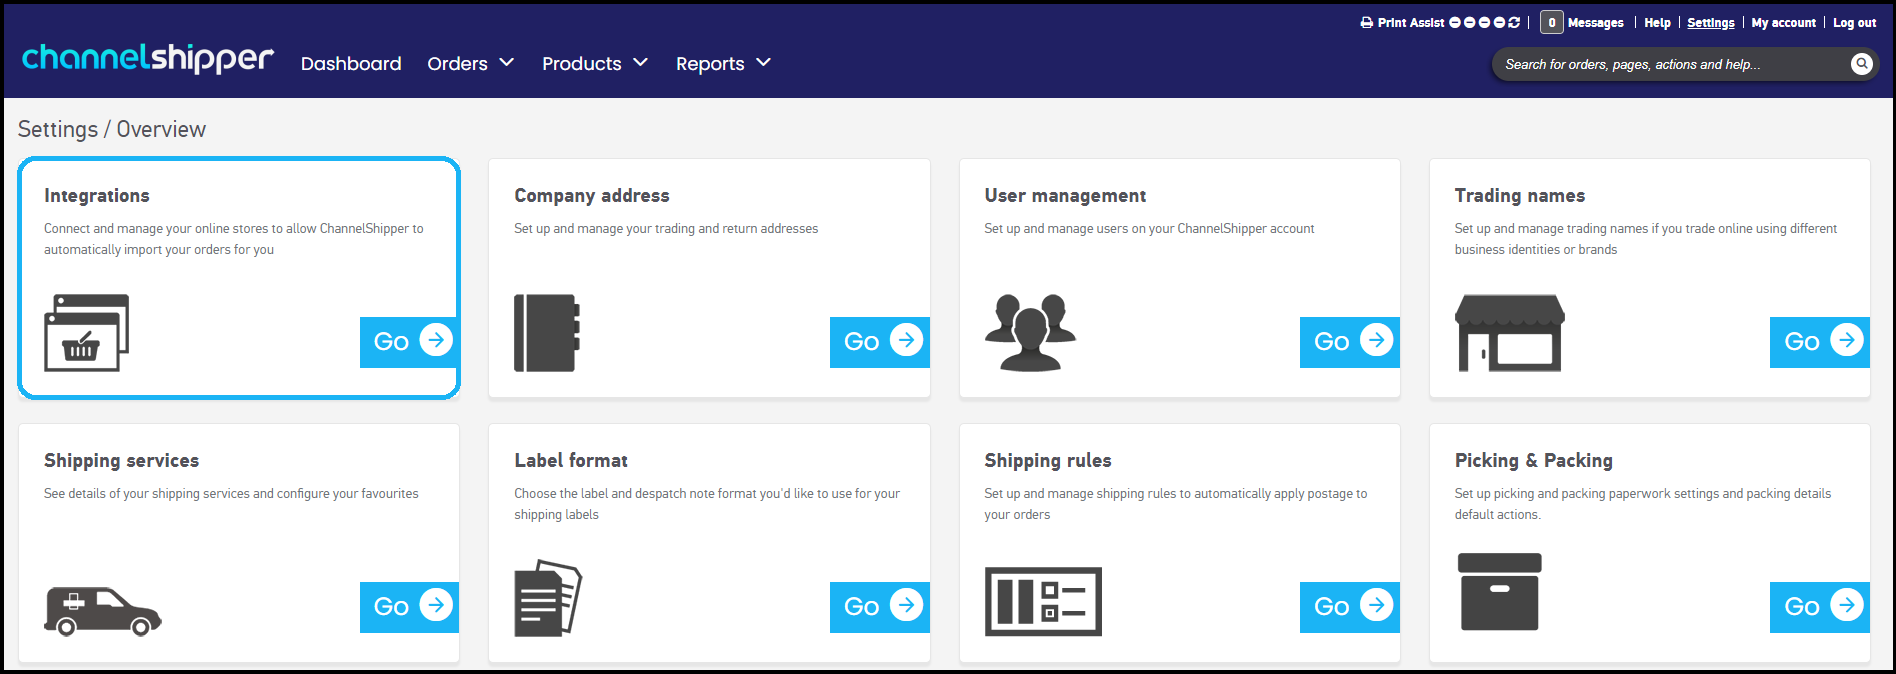
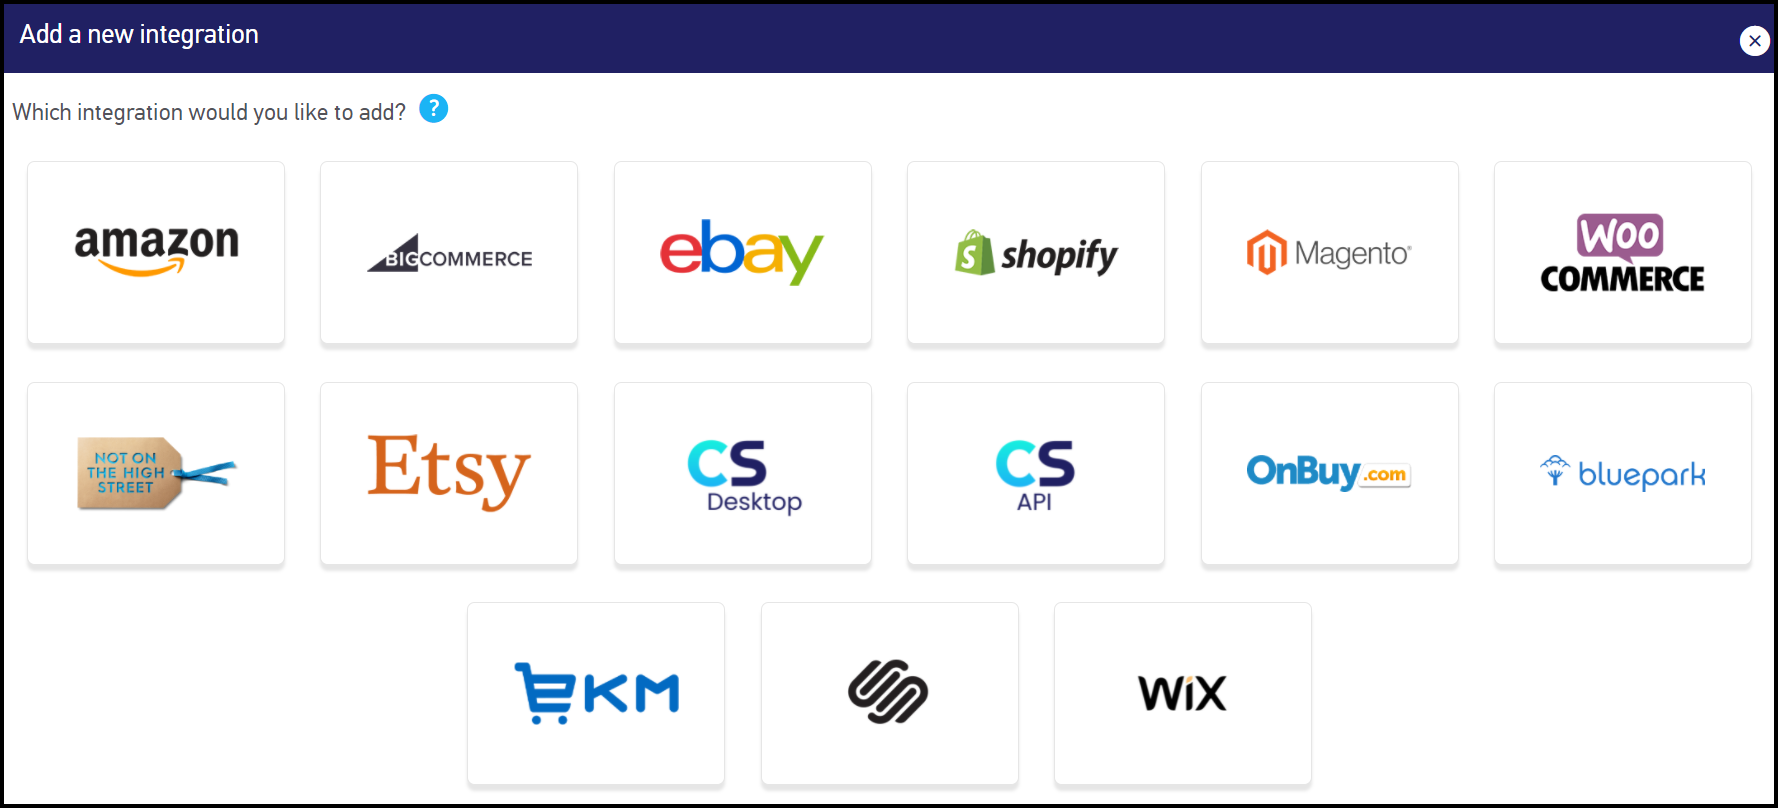
From the list that appears, select 'ChannelShipper API'.
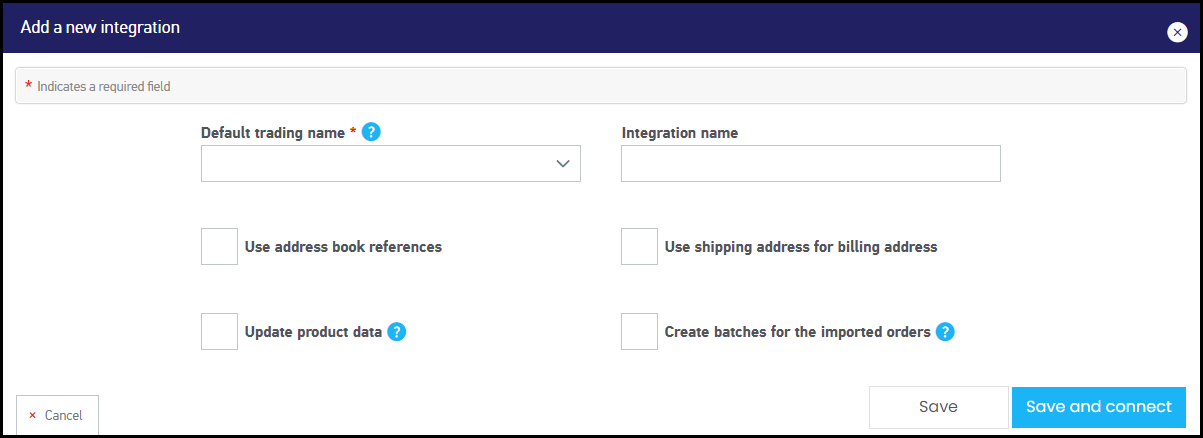
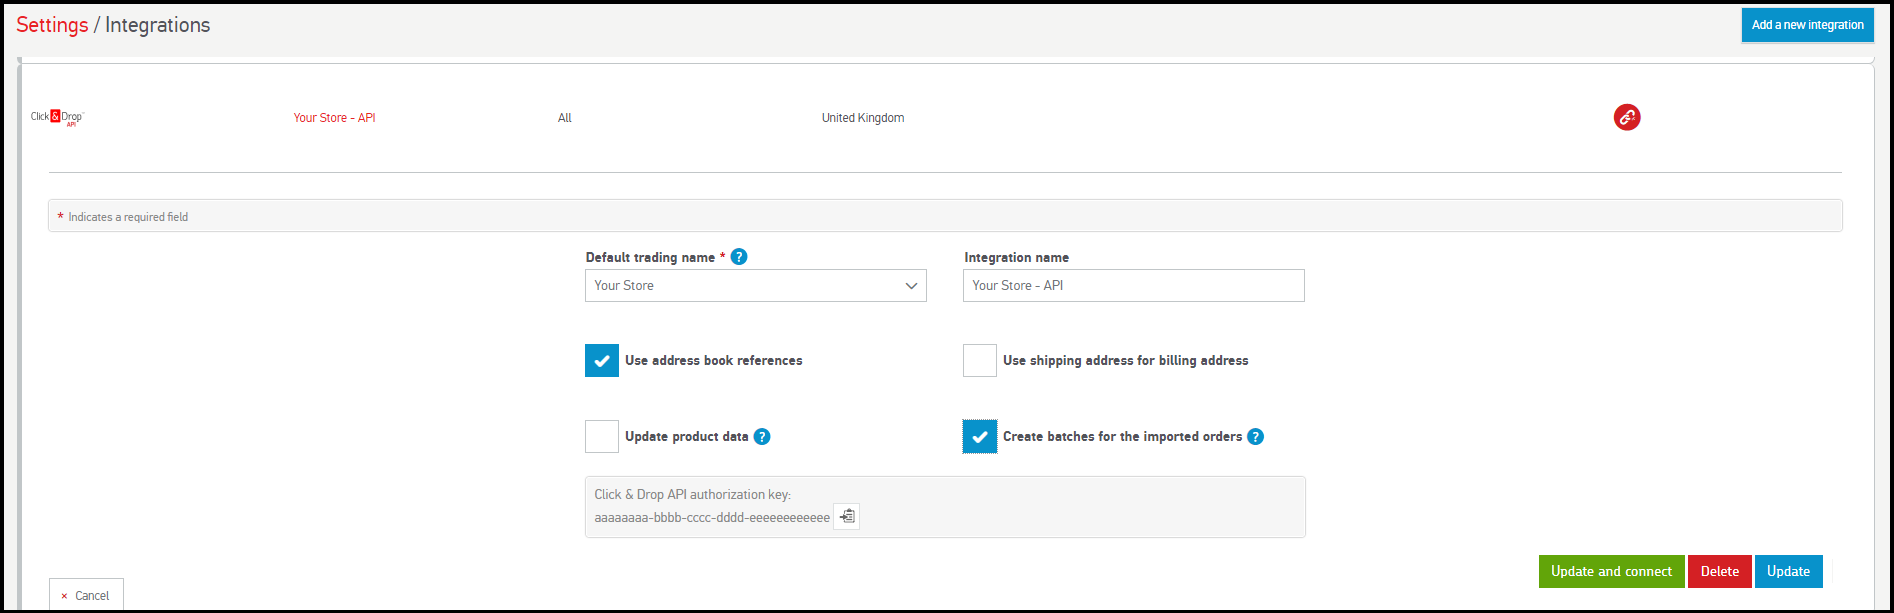
You will be presented with several integration settings:
Default trading name: Select your default trading name from the drop-down list. If you only have one trading name, it will be automatically entered. This trading name will determine the return address that is displayed on your labels.
Integration name: Choose the name your integration will be displayed under within ChannelShipper.
Use shipping address for billing address: ChannelShipper allows you to map both shipping and billing address data. If you select this option, you will only need to map the fields for shipping address data. This option is selected by default.
Create batches for the imported orders: Click this option if you wish for your imported orders to be automatically placed in batches. This occurs per API call, so if your API call contains 5 orders, all five will be placed in a single batch.
Click the 'Update' button when you are ready.
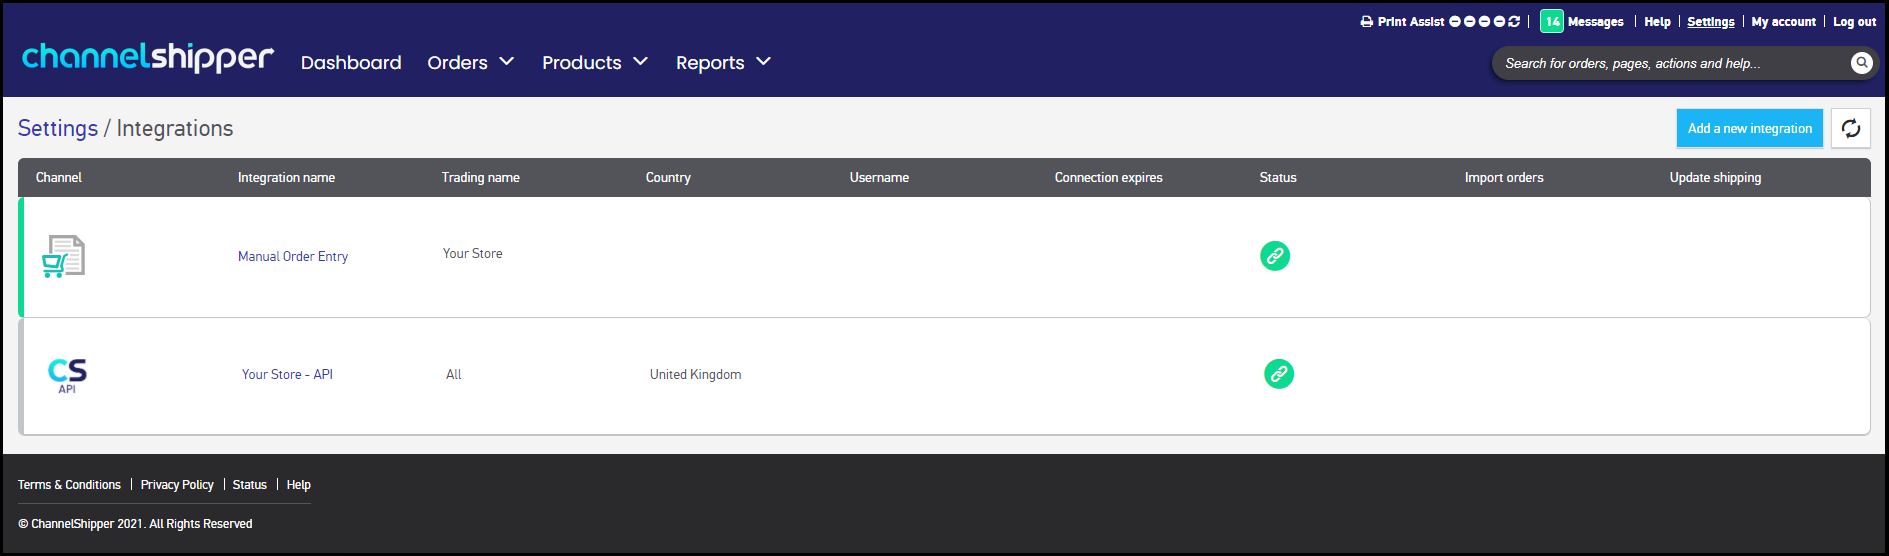
A row for your integration will be visible in your 'Integrations' page grid. Click the row to expand the grid. From here you can edit your integration settings, and view your authentication key.
Please note that only one ChannelShipper API integration can be created per account. Should you wish to import orders with a different trading name or company identity, you will need to specify this information in the call itself, see section 4 below.
3. Authentication
Developers, click here for developer docs: https://api.channelshipper.com
The ChannelShipper API uses API keys to authenticate requests.
From the integration settings page within ChannelShipper, click your ChannelShipper API integration to expand the row. Your authorisation (auth) key will be displayed here.
It is important that you keep your API key secret and do not share it publicly.
You will need to pass this auth key in the header of every API call made to ChannelShipper. Any API requests made without authorisation will fail.
curl --location --request POST 'https://api.channelshipper.com/api/v1/Orders' \

--header 'Authorization: aaaaaa-bbbb-cccc-dddd-eeeeeeee' \

--header 'Content-Type: application/json' \
4. Actions
Developers, click here for developer docs: https://api.channelshipper.com
4a. Create order
You can use the API to create orders in your ChannelShipper account. When creating an order, items must match the specific format and examples detailed in the developer docs.
Please note, orders created can be either in 'New', or 'Postage applied' statuses.
In order to generate a label for an order, you must pass a minimum of Order Weight, Service Code, and Packaging Format values, otherwise, the order will be created in 'New' status and will require you to apply postage to the order on the website.
Many international orders have additional customs data requirements that must be passed.
Multiple items can be sent by nesting multiple sets of item details.
Important Note: If you upgraded from Click & Drop - there are some differences in the API. Primarily, ChannelShipper uses custom package formats instead of the standard Royal Mail package types.
Instead of passing a packageformatidentifier value of 'letter', largeLetter' etc, you will instead need to pass a custompackageformatidentifier value equal to one of the package formats you have created in ChannelShipper. For more information, please see: How to add custom package formats
4b. Retrieve orders
By altering the URL, you can retrieve limited information about one or more orders.
The data returned is detailed in our developer docs.
To retrieve information, edit the URL and add one or more ChannelShipper order numbers or channel reference numbers separated by semicolons.
Example:
https://api.channelshipper.com/api/v1/Orders/30234;"Reference%3BWith%3BSpecial%3BSymbols!";30235
4c. Retrieve orders details
By altering the URL, you can retrieve full information about one or more orders.
The data returned is detailed in our developer docs.
To retrieve information, edit the URL and add one or more ChannelShipper order numbers or channel reference numbers separated by semicolons.
Example:
https://api.channelshipper.com/api/v1/Orders/30234;"Reference%3BWith%3BSpecial%3BSymbols!";30235/full
4d. Delete orders
By altering the URL, you can delete orders in any status other than 'Manifested'. Please be aware labels generated on orders which are deleted are no longer valid and must be destroyed.
To delete orders, edit the URL and add one or more ChannelShipper order numbers or channel reference numbers separated by semicolons.
Example:
{{baseURL}}/{{version}}/orders/"ref";1001;"Reference%3BWith%3BSpecial%3BSymbols!";2345/
4e. Set order status
By altering the URL, you can change the status on an order already in ChannelShipper to 'Despatched by Other Courier', or 'New' status.
When setting an order to 'new' status, please be aware labels generated on orders which are reset are no longer valid and must be destroyed.
When setting orders to 'Despatched by Other Courier' status, you can also provide optional 'Courier', 'Shipping Service', and 'Tracking number' values.
Orders already in 'Manifested' status cannot have their statuses changed.
5. Retrieve Labels
By altering the URL, you can retrieve all labels and documents in a single .PDF file for a created order.
Please note, the order must be in 'Postage Applied', 'Label generated', 'Despatched', or 'Manifested' status before you can retrieve a label. To ensure an order is in the right status, you must pass a minimum of Weight, Package Format, and Service when creating your orders.
https://api.channelshipper.com/api/v1/orders/"ref";1001;"Reference%3BWith%3BSpecial%3BSymbols!";2345/label
6. Troubleshooting
Error code list:
400 - Bad Request (Request has missing or invalid parameters and cannot be parsed)
This error usually means some invalid data has been passed. Check the response received for further information about individual fields.
401 - unauthorized
This error usually means the has been an issue with your auth key. Either the auth code does not match, or was not passed in the header.
500 - Internal server error
This error usually means a connection could not be established. Check the health of your connection, and check our status page where any known issues with ChannelShipper will be posted.