This guide explains how to connect your ChannelShipper account to your Amazon store. This will allow you to import, manage, and generate postage labels for your Amazon orders.
To begin, click the ‘Settings’ link. The 'Settings / Overview' page will open. Click the 'Integrations' tile.

Next, your 'Integrations' page will open. Click the 'Add new integration' button.
A new pop window will appear asking you to choose the marketplace or store that you would like to connect to. Click ‘Amazon’.

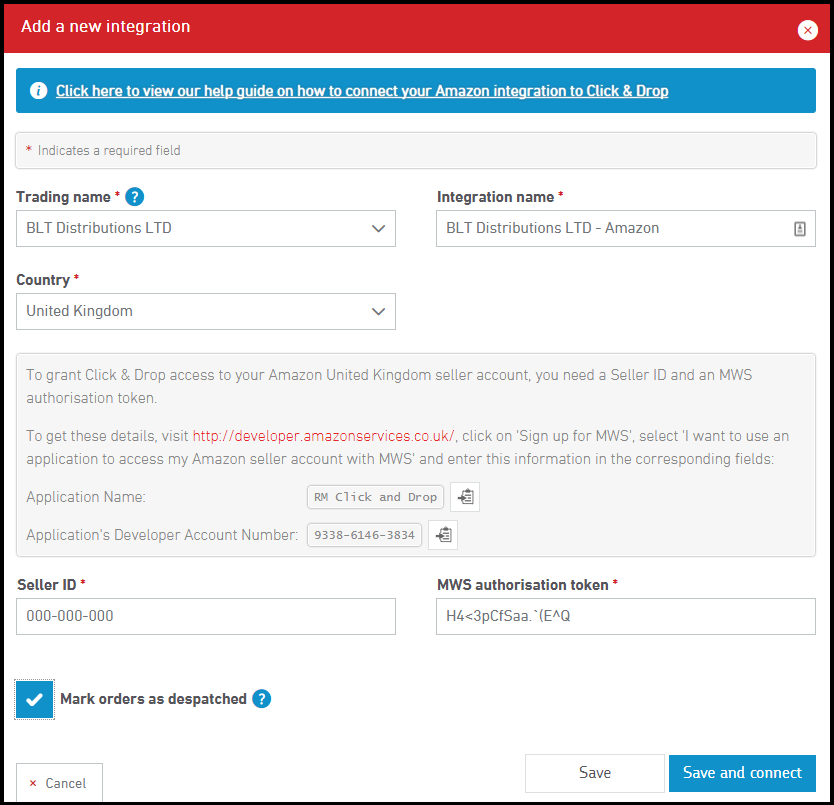
In the new pop-up window, check your trading name is correct. If you wish to use multiple trading names, you will need to create a separate integration for each. Once you have selected your Trading name, the integration name field will be filled in automatically.
from the Country, drop down menu, select the country of your Amazon marketplace.
For example, if your store ends in .co.uk, please select 'United Kingdom'.
The Amazon marketplaces we currently support are United Kingdom, Canada, Germany, France, Italy, Spain, USA, Australia, Brazil, India, Japan, Mexico, Netherlands, Saudi Arabia, Singapore, Turkey.
You can also check the 'Mark orders as despatched' box. Selecting this will save you time as your items will be automatically marked as despatched in Amazon once they are marked as despatched in ChannelShipper.
Next, you will need to log into your Amazon Seller Central account in a new window or tab. You will need to obtain your 'Seller ID' and 'MWS authorisation token' so you can copy and paste these into the fields within ChannelShipper.
After logging n, you will be taken to your Seller Central account dashboard. From there, hover over the 'Settings' option in the top right hand corner and select 'User permissions' from the drop down list.
To grant ChannelShipper access to your Seller central account, click the 'Visit Manage Your Apps' button as shown in the image below: 
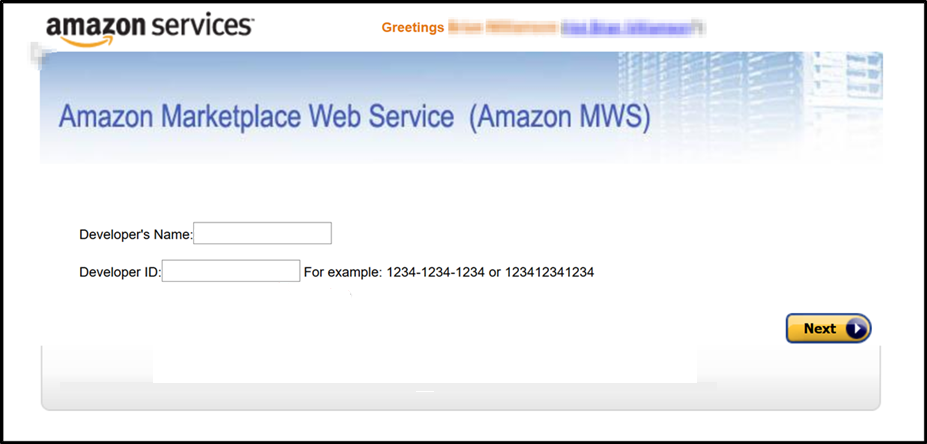
You will be directed to the 'Manage your apps page'. Click the 'Authorise new developer' button, and you will be presented with a screen asking for information about the application you are trying to connect.

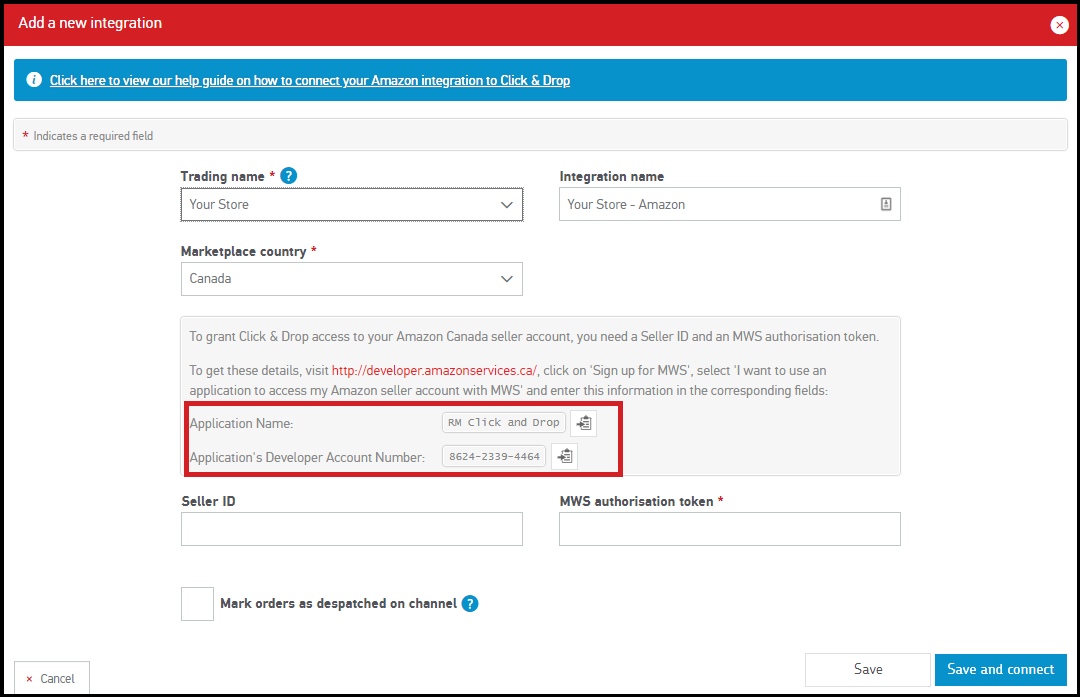
Please enter ChannelShipper's Application name and Developer ID.
These can be found within the 'Add new integration' window in ChannelShipper. Please note that the Application Developer Account Number may differ depending on which Marketplace country you have selected.

You will need to authorise ChannelShipper's access to your Amazon store. ChannelShipper is classed as a 3rd party application.
Once you have entered the information into your Seller Central account, click the 'Next' button - You will now see the terms and conditions for Amazon MWS. Once you have read it and are happy with them, check both tick boxes and click the 'Next' button
Finally, once you have entered the relevant information and accepted the license terms, you will then have access to the MWS authorisation token required to connect your Amazon account to StoreFeeder. This will also include a list of your Marketplace IDs and your Seller ID, as shown in the image below:

Once you have entered this information into your Amazon Seller Central page, click the 'Next' button.
Please read and check you are happy with the terms and conditions that will be displayed.
You will then be provided with the necessary MWS authorisation token that is required to complete your integration. Copy and paste this into ChannelShipper.

More information on allowing a developer to access your Amazon account can be found on Amazon's FAQ website: https://developer.amazonservices.co.uk/gp/mws/faq.html
Click the 'Save and connect' button when ready.
You will be returned to your 'Channels and stores' page where your new Amazon integration will be visible. Under the ‘Status’ column, you will see a red link icon.

Once the connection has been confirmed by Amazon, the icon will turn green to show your integration has been connection successfully.
This process usually take a few seconds, but please allow up to a minute for this to occur.
Store order status and import frequency
Your orders must be in the status of ‘Unshipped’, and no older than 7 days in order to import into ChannelShipper.
Eligible orders will import into your ChannelShipper account approximately every 15-30 minutes. We will attempt to update the status of orders in your Amazon store approximately every 30 minutes.
You can also trigger imports on demand by clicking 'Last import' on your Integrations settings page. The date will change to let you know the last successful date and time that orders were imported.
Can I disconnect ChannelShipper from my Amazon store?
You're free to disconnect from Amazon at any time via ChannelShipper.
In the 'Channels and Stores' section under the 'Settings' link, click on 'Go'. Click anywhere within the Amazon row to expand the data.
To disconnect the channel, click the 'Delete' button. Once you have disconnected, you will no longer be able to import and process any orders from the store.
If you need to reconnect the store at a later date, simply repeat the connection process.