ChannelShipper allows you to upload your own spreadsheets containing customer details, the weight, package type, and service used to send your letters or parcels, and a variety of other optional information.
Once these orders have been uploaded into ChannelShipper, you will be able to begin generating labels straight away.
To do so, you must first 'map' the columns in your spreadsheet. This allows Click & Drop to recognise the order your data is in. As long as the columns remain in the same order, you will only need to map your fields once. When you receive new orders, you can simply add the new data into your spreadsheet and import your new or updated files into ChannelShipper.
ChannelShipper is compatible with spreadsheets in .XLS, .XLSX, .CSV, and .ODS file formats.
Contents:
- How do I upload a spreadsheet containing my customer order details?
- What do I do if my spreadsheet contains errors?
- How do I view my import history?
- How do I add products to my customer's order?
- How do I add service enhancements to my order?
How do I upload a spreadsheet containing my customer order details?
From any page within ChannelShipper, hover your mouse pointer over the ‘Orders’ header, and from the drop down box, click 'Import'.
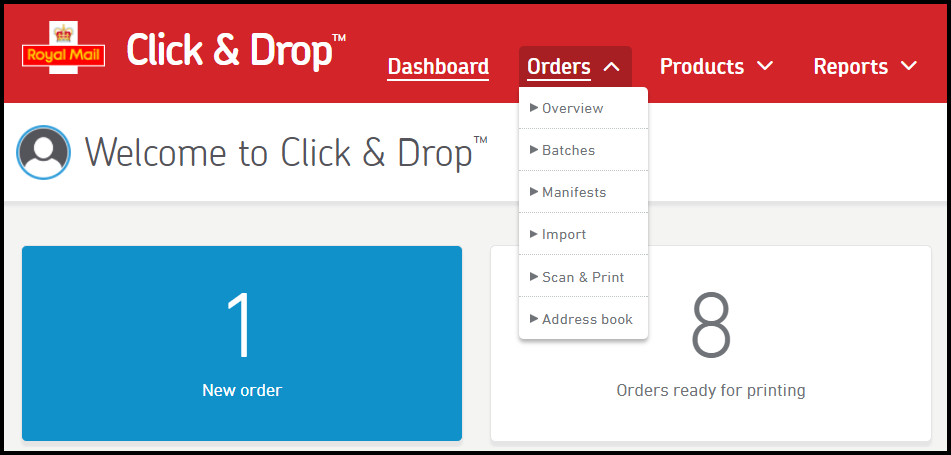
You will be directed to the 'Order import' page.
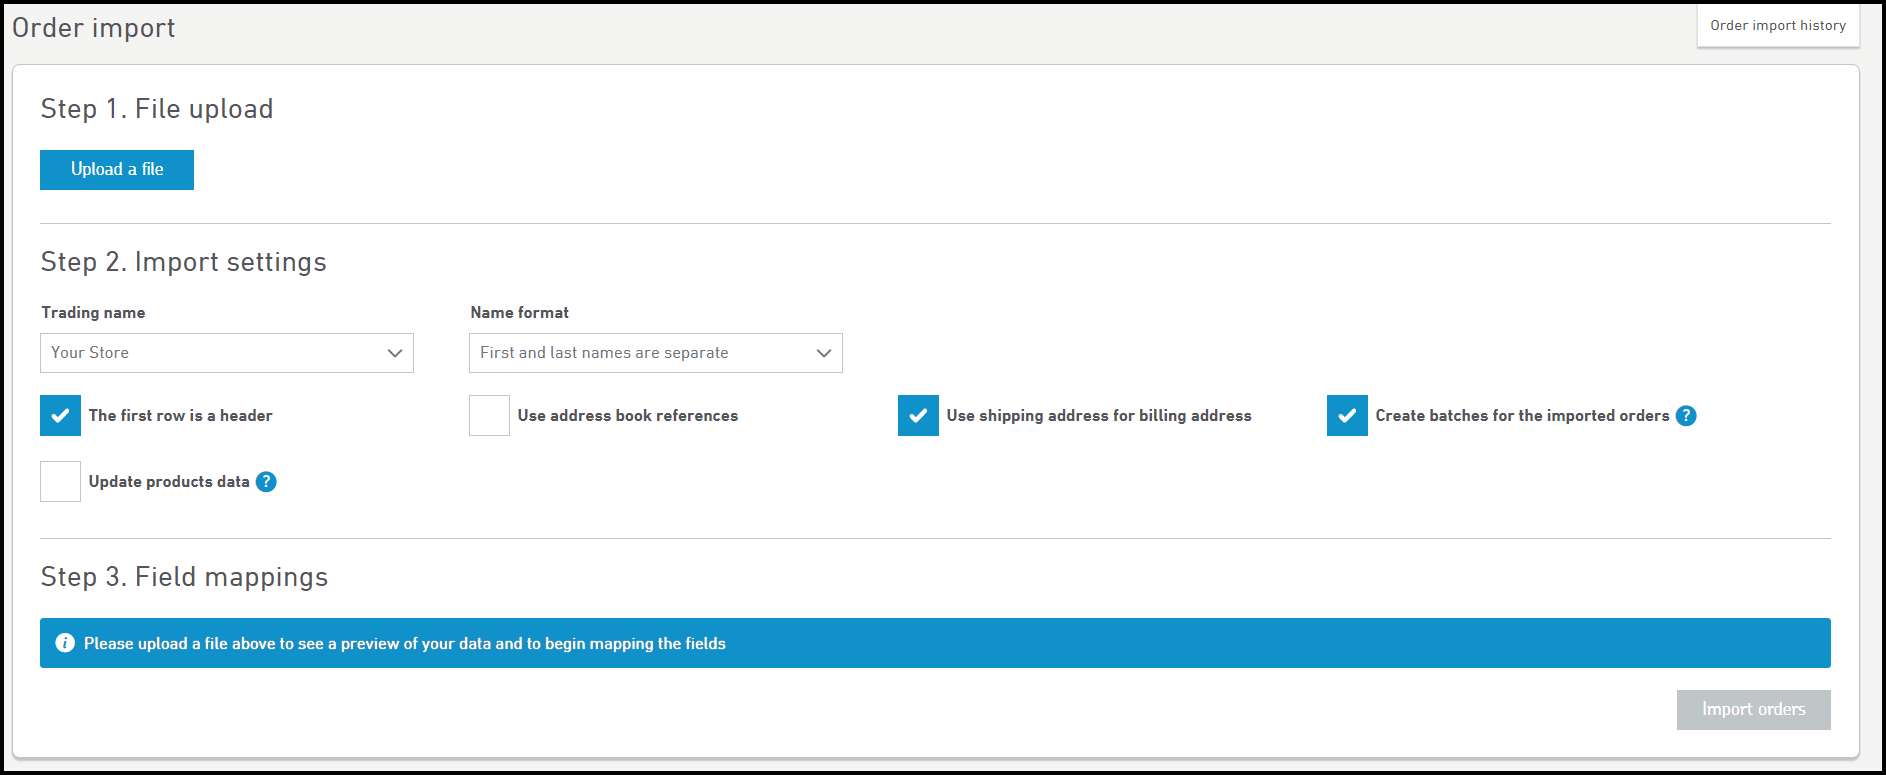
Step 1. File upload
To begin, you will need to upload your spreadsheet. Click the 'Upload a file' button, and a new window will appear.
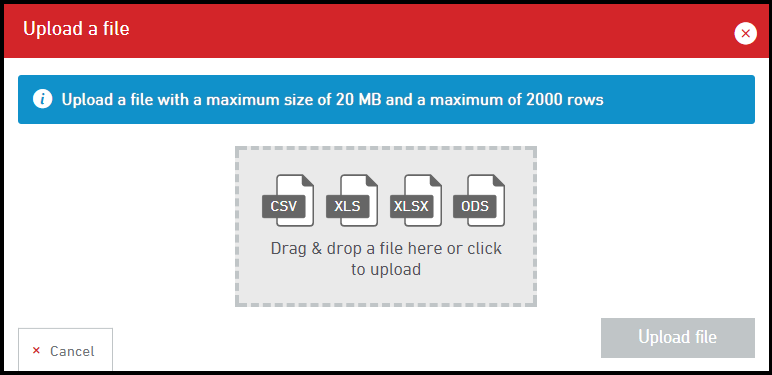
Drag and drop your file or click the icon to upload a file from your computer or device. When a valid file type has been uploaded, the 'Upload a file button' will turn blue. Click it to continue.
Your uploaded file name will now be visible on the 'Order import' page. You will now be ready to select any additional settings or options before you map your fields.
Step 2. Import settings:

The Import settings available are:
Trading name: Select the trading name you would like to associate with your Orders. Your default trading name will be automatically entered.
Name format: Select whether your customer first and last names are in separate fields in your spreadsheet, or combined into one field.
The first row is a header: Select this option if the first row of your spreadsheet contains column headers. This option is selected by default.
Use address book reference: If you have previously added customer details into your Address book, you can enter the Address Book reference into your spreadsheet and select this option. If you do, the address, city, and postcode data will be automatically included with your order. This means you will not have to map those individual fields.
For more information, see this guide: How to create an address book entry
Use shipping address for billing address: ChannelShipper allows you to map both shipping and billing address data. If you select this option, you will only need to map the fields for shipping address data. This option is selected by default.
Create batches for imported orders: This option when selected will automatically place your uploaded orders into a batch ready for further processing. This option is selected by default.
Step 3: Field mappings
When you map the fields of your spreadsheet, you are teaching ChannelShipper what the columns in your spreadsheet mean.
Use the drop down boxes as shown below to map each field in your spreadsheet that you would like ChannelShipper to use.
There are 4 required fields which must be mapped:
- Shipping Address - First Name or Last Name or Company name
Any combination of one or more of the above is allowed
- Shipping address - Address line 1
- Shipping address - City
- Shipping address - Postcode
All other fields are optional.
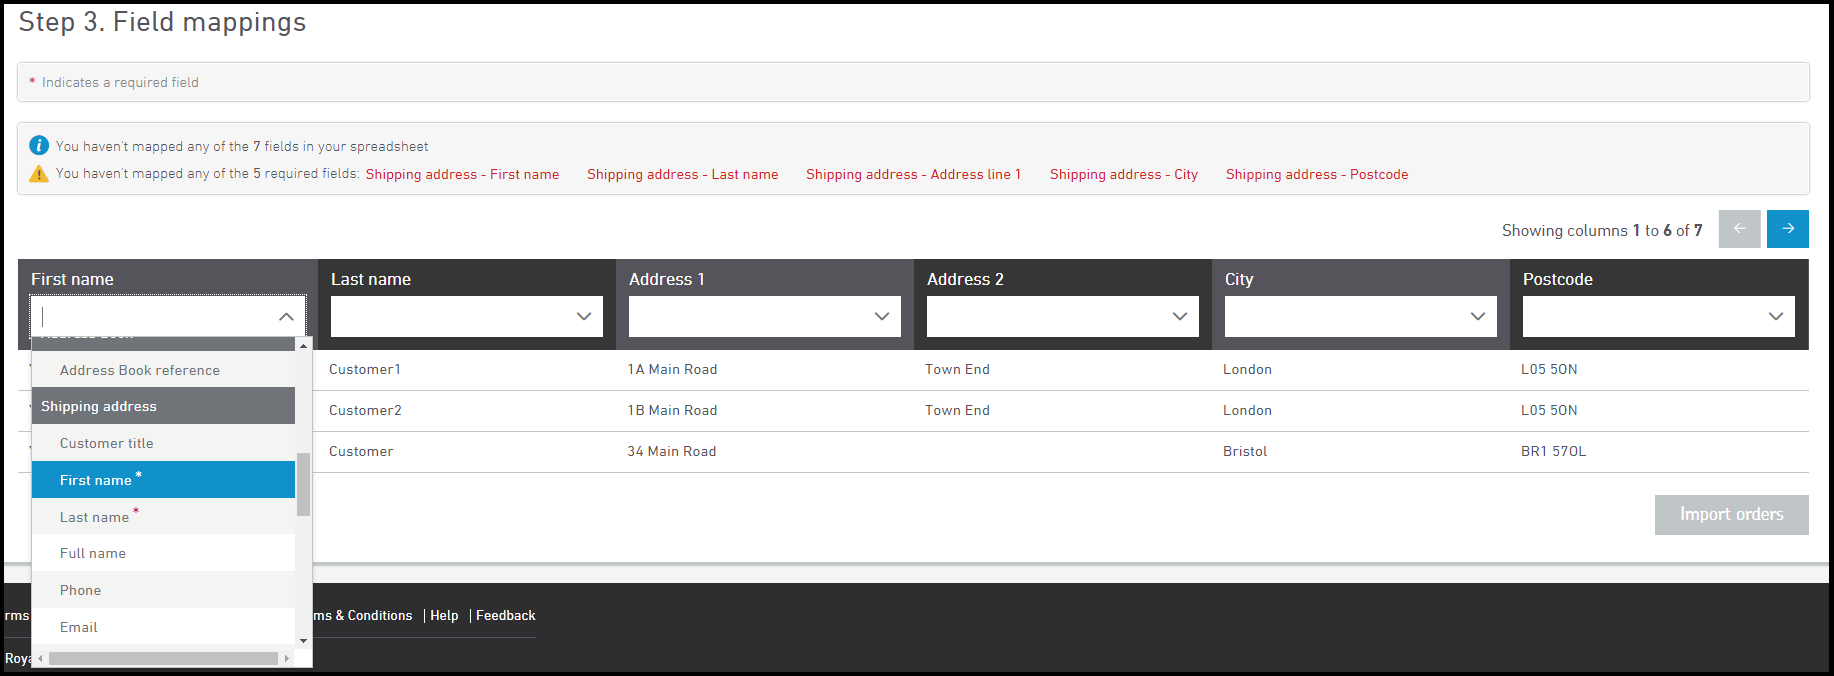
Use the arrows to scroll through the fields. For more information on the requirements of each individual field, please see this guide: Order Import spreadsheet field specifications.
Once you have mapped all the required fields, the 'Import orders' button will turn blue. Click it to continue.
Please note that if you map only the minimum required fields, your orders will import into ChannelShipper in 'New' status, meaning you will still have to manually apply postage before you can generate your labels.
If you are using ChannelShipper Desktop, Dropbox, or you want postage to be applied to your orders at the point of import, you will need to map the following optional columns: package weight weight, package size, and service code plus any service enhancements you may require.
Your orders will now be imported into ChannelShipper and will be in 'New' status. If you have mapped a weight, service, and package type, your orders will be created in 'Postage applied' status.
What do I do if my spreadsheet contains errors?
If your spreadsheet contains errors which has prevented ChannelShipper from downloading your orders, a warning message will appear to show how many errors occurred. The 'see errors' text is a link that you can click for further information:
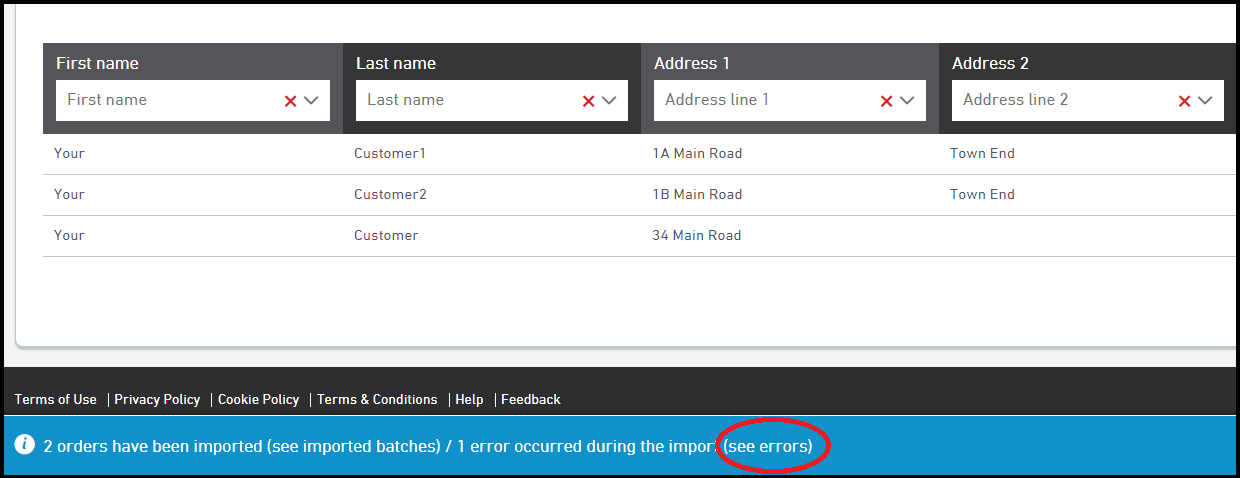
You will be directed to the 'Order import history' page where each of the orders that contained an error will be displayed. In our example, there is only one order that caused an error to occur. Click anywhere within an order line to expand the data and view the exact error:

In our example, Row 2 of our spreadsheet is missing a postcode.
from here there are some additional options.
If you click the 'Download' button, you will download a copy of your Spreadsheet so you can correct the error(s). You will need to import the file again following the steps above.
If you click the 'Undo import' button, ChannelShipper will remove the last attempted import. This will allow you to correct any errors and then re-import your whole spreadsheet instead of individual orders.
How do I view my import history?
From your 'Order import' page, click the 'Order import history' button in the top right hand corner of the page.

You will be directed to the 'Order import history' page where you will be able to view your past spreadsheet imports. Each line represents an individual spreadsheet, and shows the date, the user who completed the import, plus the status and number of errors.

How do I add products to my customer's order?
To add products to your order, there are several other fields you will need to map along with your customer name and address columns.
 Under the 'Product information' heading in the column drop down box, are the following columns:
SKU (Stock Keeping Unit) This is the unique identification code for each of your products. If you wish for your product data to be saved to ChannelShipper, you must include this column.
Name: Your product name. If you wish for your product data to be saved to ChannelShipper, you must include this column.
Unit Price: The cost price in (£) for one unit
Quantity: The quantity ordered of that product
Unit weight: Enter the weight in kg for one unit
Harmonised system code: The customs code for international orders
Stock Location: The location of your product.
Once you have included the data you require, the product will automatically be created and added to your order.
What if my customer's order contains more than one different product?
If your order contains more than one type of product, you will need to include multiple rows in your spreadsheet per order.
Each line will contain the same name and address data, but the fields for product data will be different.
In order for ChannelShipper to recognise that different lines in your spreadsheet belong to the same order, you will need to ensure that each line contains the same order reference number.
In our example below, two lines in the spreadsheet contain the same name and address data, but the product data is different. As we have mapped the Order reference number field, and both lines have the same Order reference value, Click & Drop will add both lines of product data to the same order.


Our created order now contains product details for all three of the T shirts that John Smith has ordered.
How do I add service enhancements to my order?
In your file, you can map columns for any number of the following:
Safeplace, Department (OBA only), Consequential loss, Obtain a signature, SMS notification, Email notification, Guaranteed Saturday delivery.
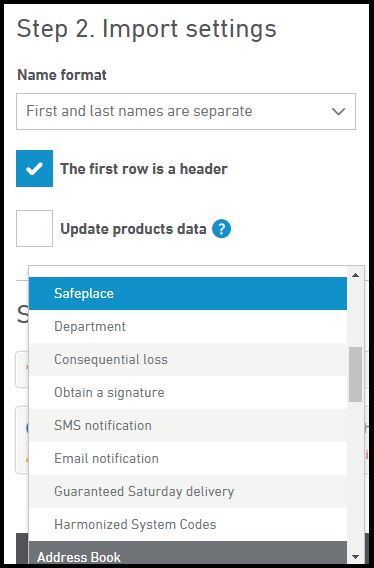
For more information on what data will be accepted in these fields, see our Order import spreadsheet field specifications guide.
You must also map a valid Service code, or service alias.
Please note that service enhancements will only be valid for certain services. If the enhancement specified is not available for the service, your order import will fail, and a warning will appear to explain which service enhancement/service combination caused the error.