To create a postage label in ChannelShipper, you will first need to create an order. Orders contain information about the recipient and destination of your post, but can also include additional information such as the marketplace or web-store your order came from, and information about your package contents.
If you have integrated one or more of your online marketplaces or web-stores, your orders will download automatically into ChannelShipper ready for processing. Otherwise, you can manually create an order quickly and easily.
When would I need to create orders manually?
If you wish to send a one-off letter or parcel, or if you get an order through an external channel, such over the phone or in person, you can manually add the information to Click & Drop in order to generate your postage labels.
How to add recipient address details
To start, you will need to enter information about the recipient of your mail. In the 'Address search' bar, you can begin typing an address or postcode or add an existing address book reference to automatically fill in the recipient address information.
If you only know part of an address, our address search function will display the closest matches for the information provided for you to choose from.
To manage your address book, please see the following guide: How to create an address book entry.
Alternatively, type the information into the fields. All required fields are marked with a red asterisk.
If you wish to create a new, or update an existing address book entry, check the 'Create or update address book entry' check box at the bottom of this section.

How to add sender details
Once your recipient details are added to the order, you will need to include your own sender details. The details chosen in this section will be displayed as the return address on your postage label, and the company address on any despatch notes.
Each of your trading names and associated company addresses will be displayed here. If you only have one trading name, this will be selected by default.
Click the trading name tile you would like to use for your sender details, and the tile will turn blue, and the 'Selected' text will be visible, as shown below.
For information on how to set up trading names, please see the following guide: How to set up your trading names and addresses.

How to add customs and package contents details
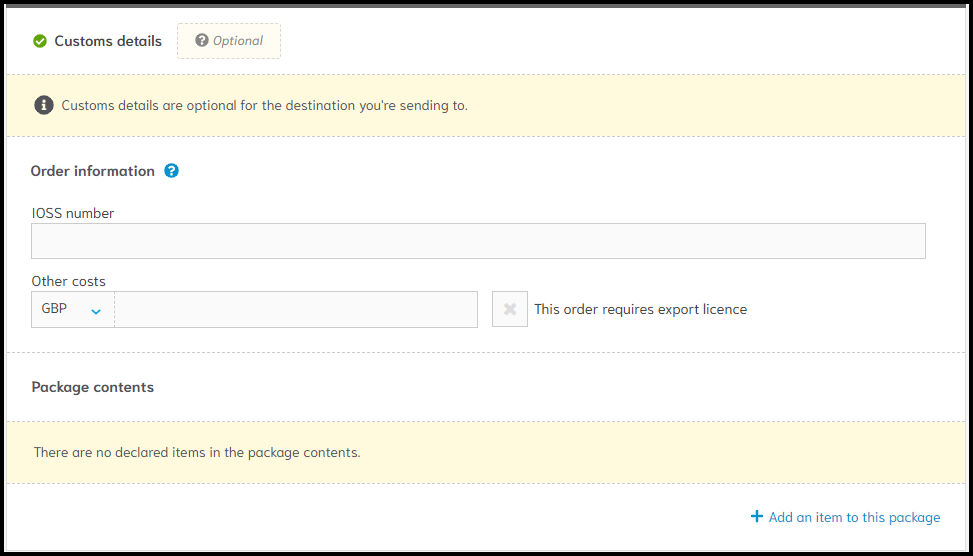
In this optional section, you have the choice to add various details about the contents of the items you are sending. For domestic orders, this information is not required. You do not need to add details in this section at this stage, but for orders to most international destinations, you will be required to add mandatory customs information before you can generate your label.

IOSS number: If you wish to send your order with an IOSS scheme, you can add the number here.
Other costs: If there are any other costs beside product and shipping costs, enter them in the field.
This order requires export license: Check if one or more of the items you are posting requires additional export license documentation that you will provide.
Next, you can add further details about package contents.

Click the 'Add an item to this package' text if you wish to continue. The section will expand and reveal several fields for details about your product(s) and customs information.
Use the grey icons to copy or delete the item, or click the '+ Add another item' text to create a new blank item.
You can add a maximum of up to 10 unique items into this section.
Please note that if you have already added default customs information, this data will be automatically filled in. For more information, please see this guide: How to set default customs information.

How to add additional order details
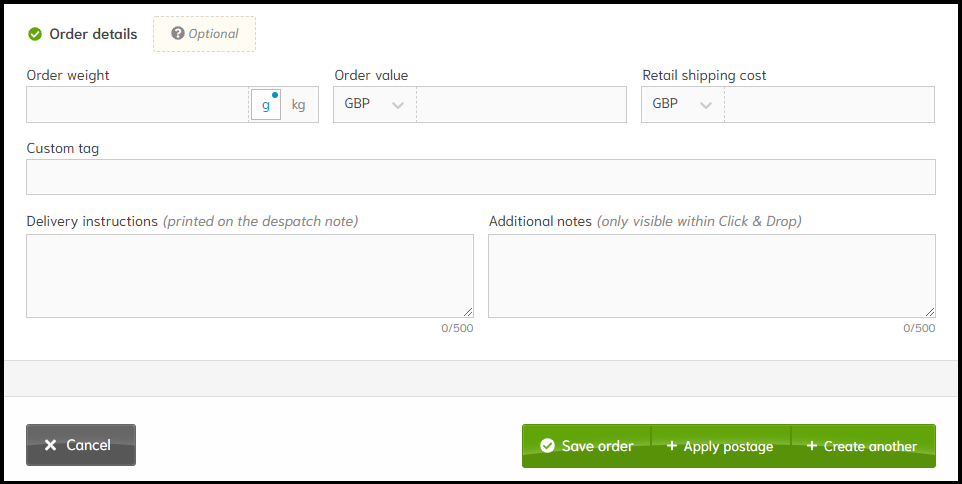
The last section contains fields for other optional order details.

Order weight: Add value in grams or kilograms.
Order value: Add value of the order not including shipping costs paid by the recipient of the items.
Retail shipping cost: Add any shipping costs paid by the recipient of the items.
Custom tag: Add an order tag that can be used to help search or filter your order when created.
Delivery instructions: Enter any instructions you would like to be printed on despatch notes
Additional notes: Enter any additional notes you would like to be visible in the order details in ChannelShipper.
Saving your order and generating postage
Once you have completed the relevant sections, click one of the following buttons to finish the process:
Cancel: This will cancel the creation of this order.
Save order: This will save the order with the details you have entered ready to apply postage and generate a label at a later time.
+ Apply postage: This will save the order with the details you have entered and direct you to the Apply Postage stage of order processing.
+ Create another: This will save the order with the details you have entered ready to apply postage and generate a label at a later time, and clear the Create order page so you can start again.
