In addition to creating each product manually in ChannelShipper, you can upload multiple products at once via spreadsheet.
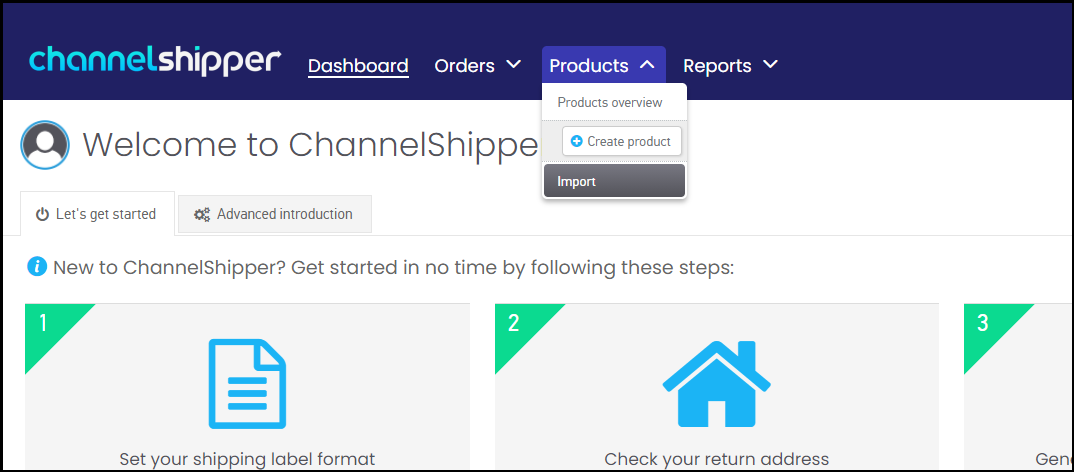
To begin, click ‘Products’ on your ChannelShipper menu bar, and on the dropdown menu, click ‘Import’.
You will be directed to the ‘Product Import’ page. From here, you will be able to upload your spreadsheet and map the fields ready for import.
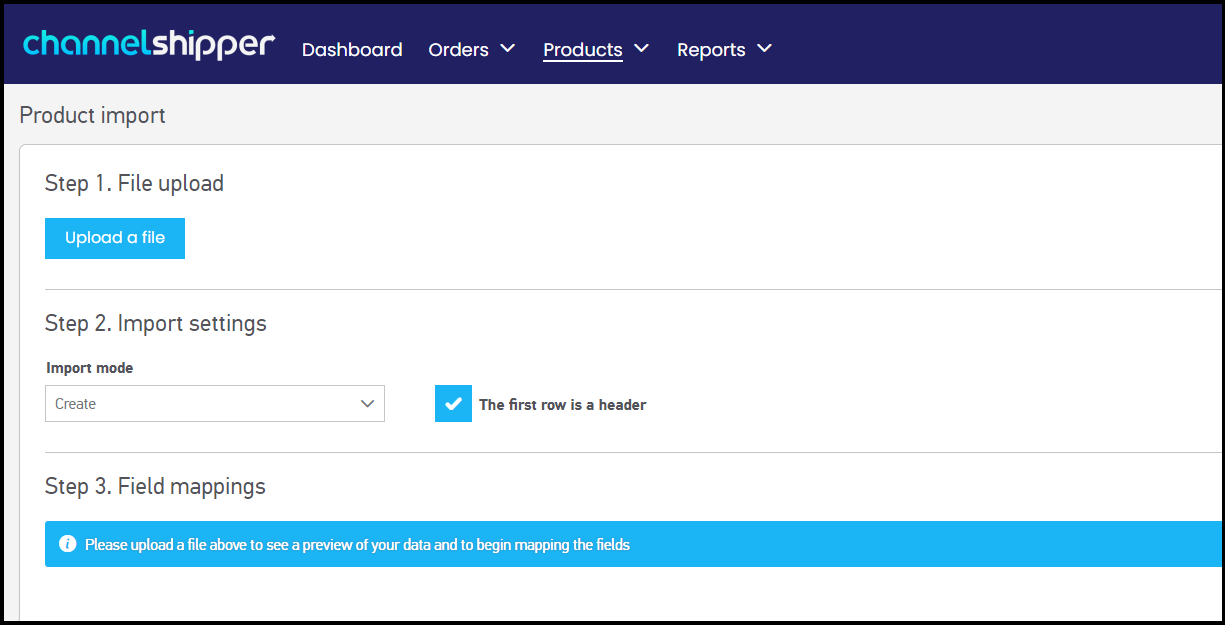
Step 1: File upload
Click the ‘Upload a file’ button, and a pop up window will appear where you can select the spreadsheet file from your computer or device:
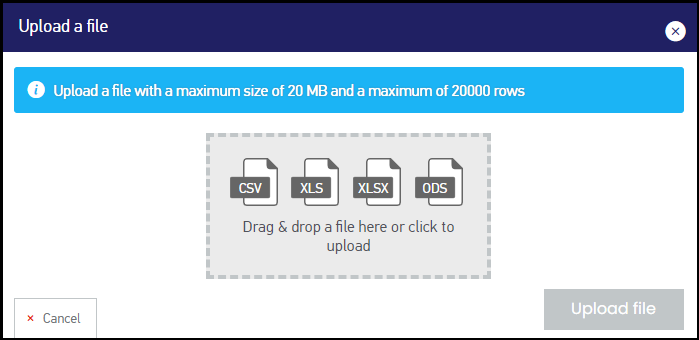
Spreadsheets can be in CSV, XLS, XLSX, or ODS formats, no larger than 20MB and with no more than 2000 rows. Please ensure your spreadsheets do not contain macros.
Once you have selected your file, The ‘Upload file’ button will turn blue. Click it to proceed to the next step.
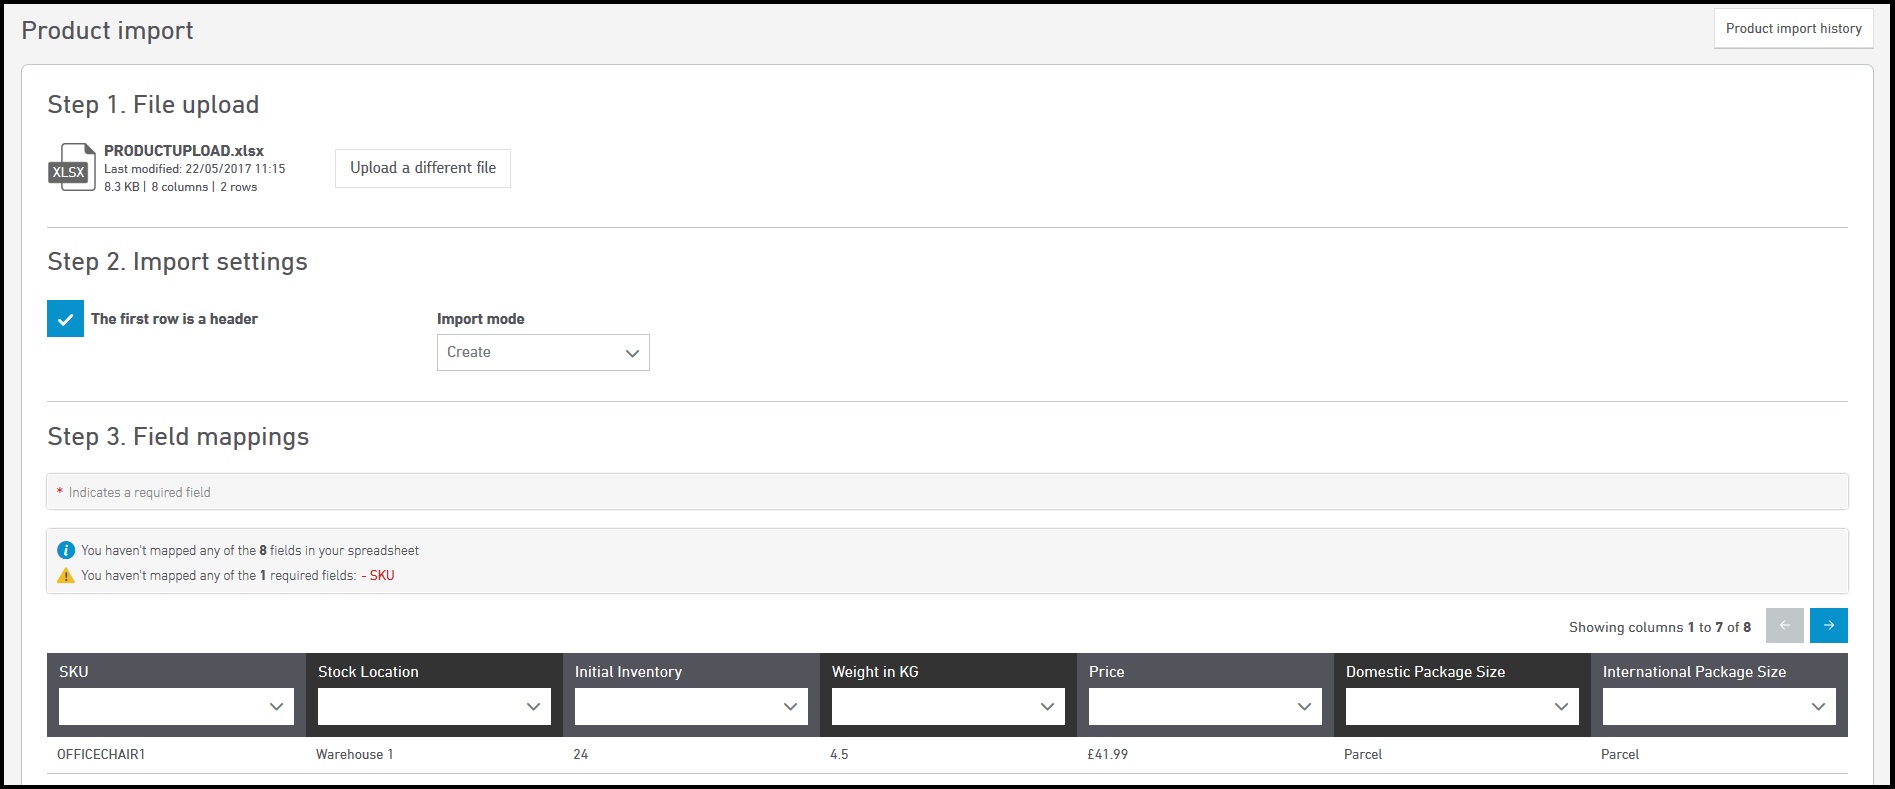
You will now be able to see your uploaded file on the ‘Product import’ page:
Step 2: Import Settings
In this section, there are two settings:
Check the ‘The first row is a header’ box if you have headers in your spreadsheet, and you do not wish for that row to count as a row of data.
In the ‘Import mode’ drop down box, you have the following options:
Create: The products import will be saved as new products
Update: The products you import will update and overwrite your existing products
Create and update: This option will create new products where the product SKU is not already in your saved products, and will overwrite your existing products where the SKU is the same.
Step 3: Field mappings
This section will display the columns in your spreadsheet. The next step is to map the columns to the fields in ChannelShipper:

The fields available for mapping are in alphabetical order. Please note only Identifier(SKU) is a mandatory field.
Country of origin (required for international orders): The country where the product was produced
Customs code: The 6-10 digit customs code
Customs description: A short description of the item. Example: 'Red polyester and cotton T shirt - size Large'
Extended customs description: A longer and more complete description of the item required for certain services and destinations.
Identifier(SKU): Your unique product reference number
Image URLS: Enter the URL of any product images.
For Image URLs, please include the https:// or http:// in the URL. For multiple URLs, include the vertical bar/pipe (|) symbol between each URL. Do not leave spaces.
Example for one image: www.yourcompany.com/images/bluetshirt.jpg
Example for two images: www.yourcompany.com/images/bluetshirt.jpg|www.yourcompany.com/redtshirt.jpg
Initial inventory: Add the starting quantity of this product
Name: Add a name for the product
Package format: Add the smallest package size for this product. For more information on creating package formats, please see the following guide: How to add custom package formats
Price: Add the product price in £GBP
Requires export license: Enter '1', or 'Y' if the product requires an accompanying export license for international orders.
Size: Add the size value of the product
Stock location: Add the zone or location where the product is kept
Tags: Add up to 5 product tags separated with commas
Weight in KG: Add a number to a maximum 3 decimal places
When you have mapped your fields, a green tick will indicate the SKU field has been mapped successfully:

Click the ‘Import Products’ button to finish.
When your product or products have been imported successfully, a message bar will display how many products have been successfully updated.
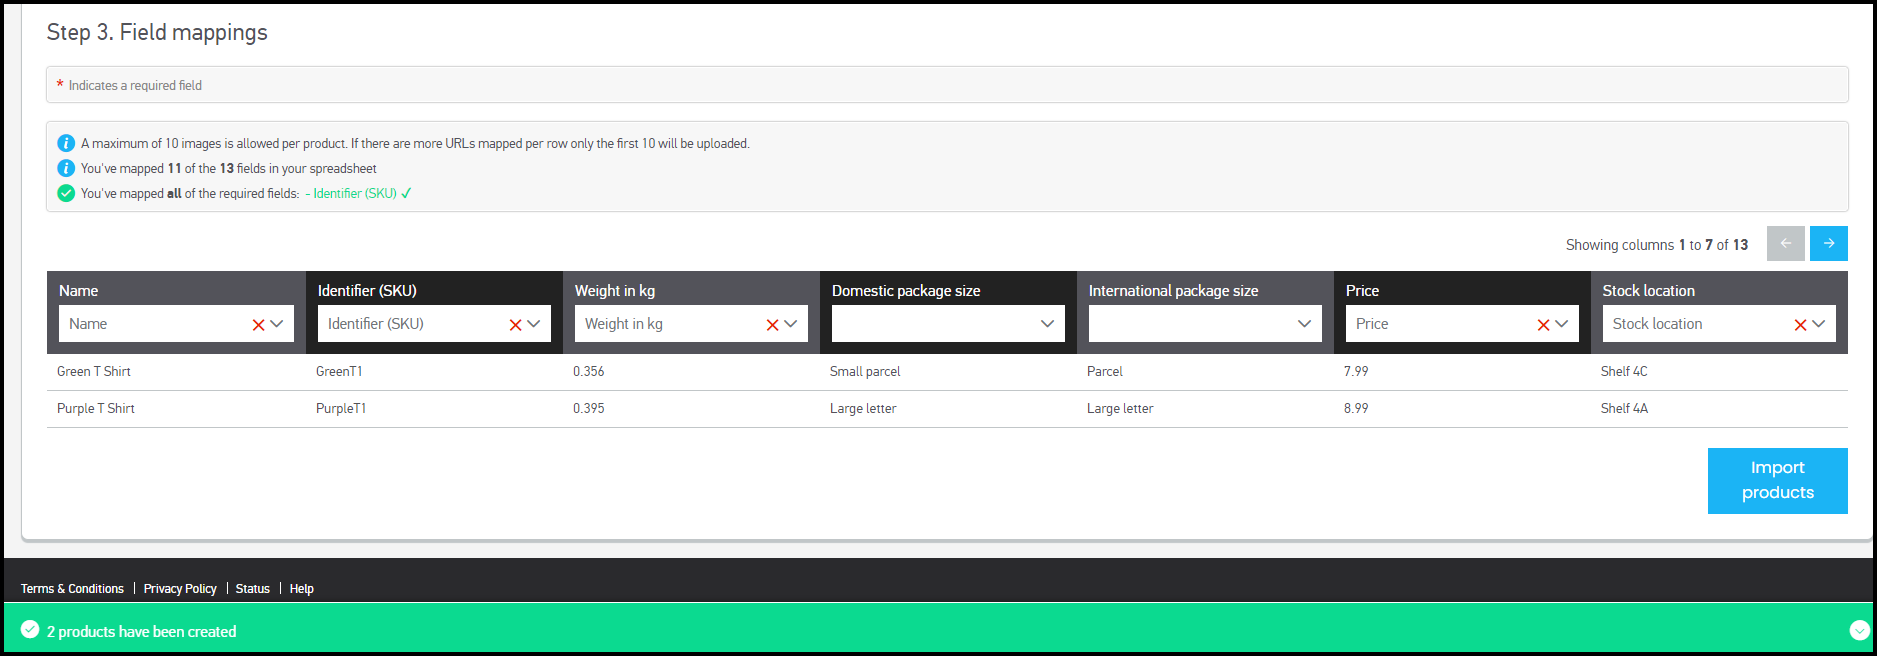
The imported products can be found in your main 'Products' page.
What to do if your import has been created with errors:
If your import was created with errors, you will see a warning message:
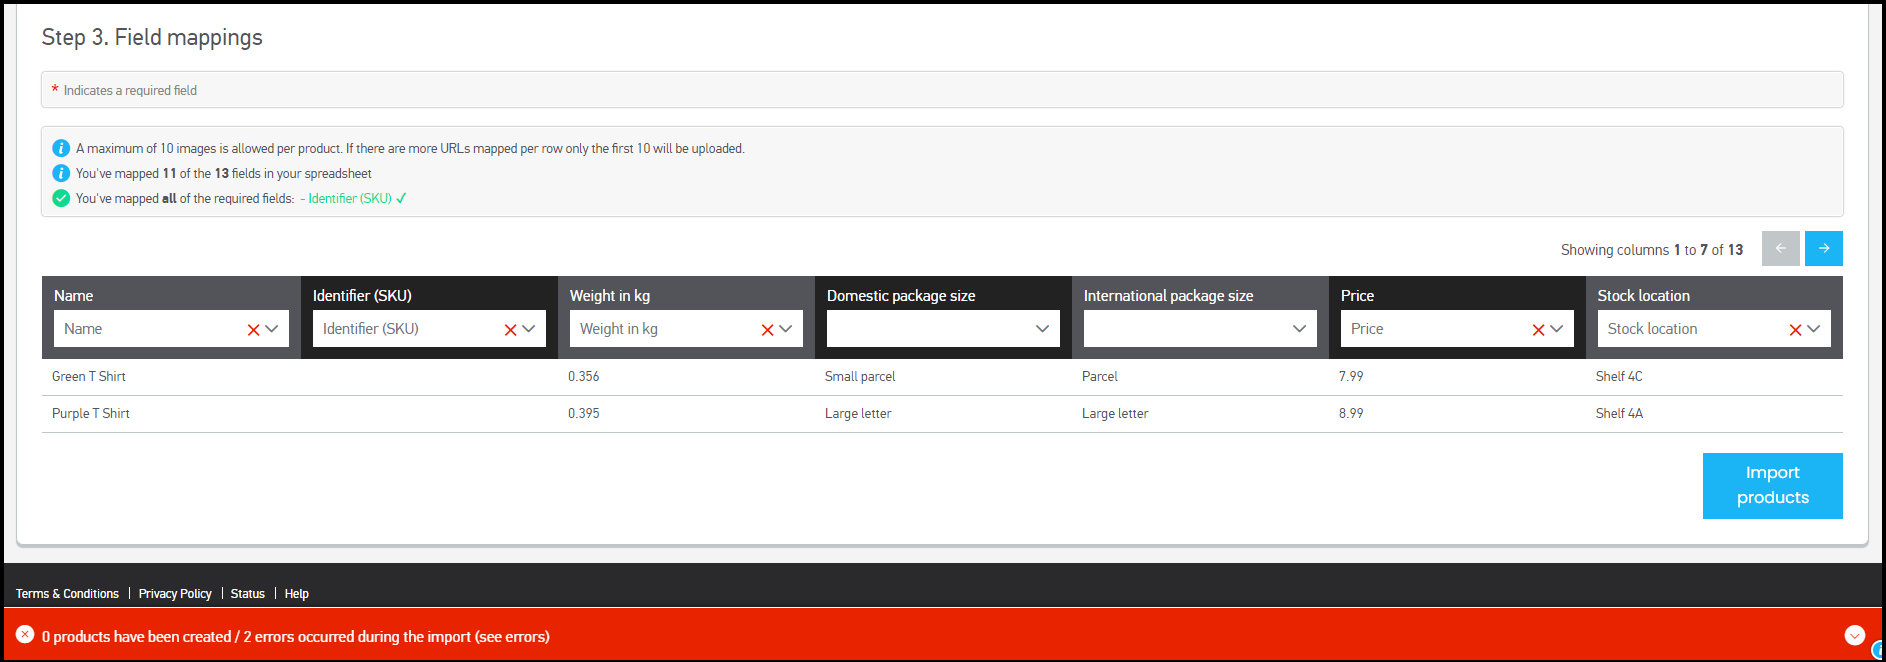
Click the text ‘See errors’ in the orange warning bar and you will be directed to the ‘Product import history’ page that will explain the error.

In our example, both imported product rows were missing a value for 'Identifier/SKU'
You would need to correct the values in the spreadsheet and begin the upload process again.