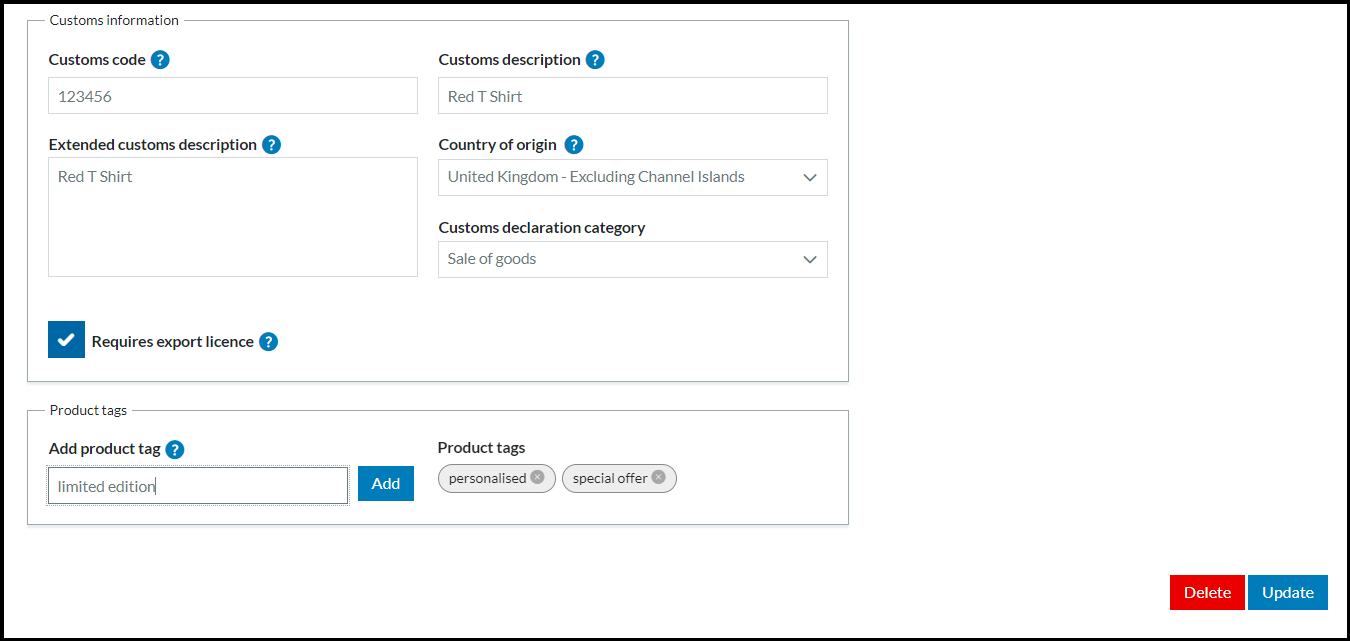
If you need to display important information about your products both on screen and on printed documents, you can do this by adding one or more product tags.
Method 1: Add directly to individual products
To begin, go to your Products page and find the product you'd like to add tags to.

Click into the product, and scroll to the 'Product tags' section at the bottom of the page. Here, you can add a tag by typing it into the text box. Click the blue 'Add' button and the tag will be added.
You can add up to five tags this way. To delete a tag, simply click the grey 'x' symbol next to it.
Once you've done, click the blue 'Update' button at the bottom of the page, as that will save the tags you have created to your product.

To make tags visible on the orders grid, click the cog icon in the top right of the grid as shown in the image below, and select 'Tags' to make the optional product tags column visible.

Method 2: Adding products via spreadsheet
If you want to add multiple new products complete with product tags, or add them to existing products, you can do this by importing all relevant data in a spreadsheet.
More information on this can be found here: How to import your product data
When you import data, you can map a new 'Tags' field. You can add up to 5 tags this way, separated by commas.
Example: Personalisation,Limited edition,Handle with care

Where are product tags displayed?
Product tags are displayed in the following places:
1. Products page
2. On all picking and packing lists
3. Orders and View/Edit batches pages